Wednesday, February 22, 2012

Gallery Show: Songs in One’s Head—part 2

The theme for the February 2012 show is “Songs in One’s Head”. Artists were asked to create work based on the titles and phrases from songs that they love.

Another artist that was selected to receive recognition for her work in this show was Lynn Hoffman.

Hoffamn_-_On_the_Street

Lynn received recognition for a body of work that includes “On the Street Where You Live” (above), “Industrial District 2” and “Yellow Submarine”. Her fiber technique is fabric collage which involves

Hoffman_-_Indus_Dist_2 Hoffman_-_Yellow_Sub

the use of hundreds of small bits of fabric meticulously formed into images and then stitched. This creative style involves hours of carefully placing each piece in order to achieve the color balance, structure and hard edges that form the shapes of her work.

In addition to fabric collage, Lynn also enjoys beadwork, crochet, dyeing, felting and quilting.

Saturday, February 18, 2012

February Gallery Show: Songs in One’s Head


The theme for the February 2012 show is, “Songs in One’s Head”. Artists were asked to create work based on the titles and phrases from songs that they love.
One of the three artists who received recognition for her work in this show was Anna Yakubovskaya.
Anna’s piece, “Firebird”, is a painted silk scarf of intricate detail. The jury team commented that this piece brought to mind the passion and reverie from Stravinsky’s “Firebird Suite”.
Anna_-_Firebird
When asked about her inspiration for the creation, Anna replied that the firebird is a common character in Russian fairy tales. In her silk painting, she often finds inspiration in Russian folk art. Its naïve simplicity and bright colors always bring pleasure to the eyes and joy to the heart.
Technorati Tags: ,,

Thursday, February 16, 2012

Unlocking The Block- Part 1

The creativity is flowing. You’re cutting, you’re dyeing and embellishing. Photos have been transferred and yarn selected. The to-do list is long but, you’re scratching things off as you reach your goals. There aren’t enough hours in the day to finish all that you want to do. What a great feeling.

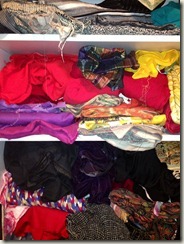
But, what happens when nothing happens? You hit the wall and there are no ideas. Nothing seems to work. Your huge  pile of fabric has lost its inspiration. The new paints you just received seem dull.  No sketches hit your journal and your studio seems hollow. You’re blocked!!  It’s happened to many artists. For some, these spells last for a few hours but for others, weeks and weeks drag on and …still nothing. What do you do? How can you get past this? fabric stack--2
Sometimes the remedy is something that can be handled right away.

Tired? Get more sleep. The quickest way to slow the flow of ideas is by trying to work while sleep deprived.

Out of Shape? Move around more. Many artists find that time spent on a brisk walk in a nearby park or breathing through a yoga pose clears and unclutters the thought processes.

Think you’re alone? You’re not. Call an artist friend and share your anguish. After all, misery loves company and a piece of chocolate.

Try a few techniques that Joanne Bast has used when she needs to refresh the artist within:

1. Take photos during your travels. Thinking of places you’ve been, especially if it’s another culture with different art emphasis, often sparks ideas. Joanne was actually sending her ideas from Ho Chi Minh City.

2. Search out calls for exhibits. Sometimes the titles of the exhibits will give you an idea even if you’re too late to enter that show.

3. Current events also yield ideas that can be expressed in art pieces.

4. Think of old movies, particularly old musicals, and/or browse catalogues of clothing or dancewear for figure positions and color combinations.

5. Root through your stash of materials, beads and yarns and group things that look good together.

6. Collage papers, patterns, etc. until something catches your eye.

Try one or all of these and see where they take you. There are more ideas coming from others. Stay tuned.

Technorati Tags: ,

Thursday, January 26, 2012

Design decisions


The fiber art in our gallery is one-of-a-kind.  Thought goes into creating each piece.  Eileen Doughty shared the decision process that went into making the silk paper earrings that won a jurors' recognition in our show this month.

Eileen said, "I was very pleased to receive jurors' recognition for my silk paper earrings, along with Janet and Ann.  Though my earrings are obviously smaller and less complex, the process still requires many steps and many artistic decisions. Like all of our gallery's fiber art, these are definitely not mass-produced.

"Like Janet, I learned to make silk paper from the master - Robin Russo.  I buy her dyed tussah in a variety of hues.  I choose which colors to combine into a paper, and add embellishments such as specialty threads or dried flower petals.
silk paper
"Deciding to make a set of earrings for our "Wondrous, Lustrous Silk" show, I chose a paper I'd made previously, in dark orange and blue (complementary colors), embellished with a shiny blue thread and copper gilding chips. Next I had to think about what the finished object would look like.  I opted for a 3D shape: cones.  And to make it twice as fun, two stacked cones.  Cutting scrap typing paper into sample cones let me play a bit in order to decide how big to make them,  and how much of a bell opening to have.  When satisfied with my test, I used that paper as pattern for cutting into the silk paper.  The next decision was where on the silk paper to cut, in order to make the most of the variations in its color and embellishment.


"Looking at the silk cut-outs, I thought it needed just a little more interest, and decided to free-motion machine stitch copper thread on the bottom edges.  The cones were stitched closed by hand, and strung on a fine wire with some beads to space them and allow them some movement.  One copper bead is added at the top.  The ear wires are copper, to mesh with the color scheme."

Eileen uses silk paper for other jewelry, such as the necklaces shown below:
Silk Squares

peach necklace

Eileen concludes, "Next time you see some hand-made fiber art, take a moment to think about all the steps and decisions that went into making it.  We love what we make and we hope it shows!"

Thursday, January 19, 2012

Ann Liddle's Silk Vest


Another piece the judges of Wondrous, Lustrous Silk chose to highlight was described as "Ann Liddle's subtly luscious hand-dyed silk vest."  I asked Ann to tell us about her vest, her other work designing garments, and some of the other fiber media she uses.

Ann said "I was delighted to get a juror's choice award this show for my vest. It's hand-dyed silk dupioni with machine-stitched china silk. I added the machine stitching to the orange china silk to help it blend more with the reds in the hand-dyed silk. I also created the pattern by draping it on a dress form. I often make patterns but usually use the flat paper pattern method. This time I cut up a few pieces of cotton knit and worked it out on the dress form – then made a paper pattern. My next task will be to add sleeves – maybe I'll try draping that too.

"I've been sewing since I got out of college and bought my own machine. My mother had taught me some but I didn't take to is until I was on my own. Then I never stopped! I sewed many of my work and casual clothes – suits, pant suits (once they were allowed!!), dresses, jackets, evening dresses, even coats. About 15 years ago, I decided to stop using commercial patterns and make my own. I'm self-taught – thanks to books and Vogue patterns. But since I don't usually make fitted clothing, the pattern process is not too complicated. Using Vogue patterns for years gave me a very good grounding on how to put things together and how to make all those annoying parts you need to make a garment – facings, cuffs, plackets, collars, etc. Really, Vogue patterns were an excellent education.

"In addition to clothing, I also make sculptures and do other types of fiber art. I especially enjoy working in three dimensions. Maybe that comes from my interest in clothes. I use many different media and techniques for sculpture, including papier mache, crochet, and knitting. 
Shapes and Shadows
hand stitched on painted canvas, wood, wire
  
Vase with Red Stripe
papier mache, painted

"It is fun to take a technique, such as crochet, that is not usually used for sculpture and make it work. 
The Conversation
crocheted wool, stiffened, painted, wood base

"In fact, that is my main pleasure in all the clothing or other art that I do – getting an idea and making it work. I love to figure things out."

I hope you've enjoyed this brief tour of Ann Liddle's art.  Next time, we'll discuss Eileen Doughty's design process for her jurors' recognition earrings.

Thursday, January 12, 2012

Wondrous, Lustrous Silk

A new show opened in our gallery on Monday.  The theme is Wondrous, Lustrous Silk.  The jurors always select three pieces to highlight.  One of those chosen was Janet Barnard's silk paper clutch purse.


Janet says, "I became acquainted with silk paper making when, in 2003, I attended a silk paper workshop at Creative Strands, taught by Robin Russo.  The process was simple and the resulting “paper” was more like heavy fabric, which I felt increased its uses over that of regular paper. 

"The process begins with silk top of noil, bombyx, or tussah, either natural or dyed. I dye my own top using the same method as silk fabric, thereby having access to an infinite number of shades.  The top is then pulled apart and layered on netting, first in one direction, then at a 90 degree angle. This gives the paper added strength and prevents sections from peeling away or splitting.  At this point, embellishments of any type may be added to the surface – string, glitter, leaves etc. A top layer of netting is added to keep everything in place. 

"I wet the top with a mixture of soapy water to break the surface tension, as the silk can be difficult to soak through. Using a paint brush, I saturate the silk with a mixture of Artist’s Medium and water, which binds the silk together.  I hang it to dry, peel off the netting, and it’s ready to go. I’ve used my paper to cover hand-made boxes, for jewelry, cards, sculptures, and now purses."

Here's a sculpture that Janet made using silk paper:


It includes cocoons as an embellishment. These are not dyed; this is their natural color.


Janet has also used silk paper for collages.  Here is an example, "Complete This Series."


Next week, we'll feature another artist who works in silk paper.

Monday, January 9, 2012

Local Continuing Education Opportunities

This is Floris Flam, the gallery blog editor for January. The following material was written by Betty Ford, one of our gallery's art quilters, and discusses a workshop she took on fabric painting.

We've discussed how our gallery members travel to attend workshops to improve their technical and design skills and to master new techniques.  Sometimes we have the opportunity to learn without leaving town.  The Washington area is rich in learning opportunities for fiber artists such as the Art League School in Alexandria, VA.

Recently, gallery member Betty Ford learned new fabric painting techniques from gallery member Julie Booth at a series of classes sponsored by the Art League.  It consisted of seven weekly classes at which Julie presented various techniques where the students had time to experiment and learn by doing and to produce a large number of exciting samples. Here is the report of a happy student.

"The class began with our creating painted background fabrics using Pebeo SetaColor — fabrics on which we could layer other surface design techniques. These backgrounds were created in a number of ways, some resulting in pieces that were quite plain:


while others were more complex:


On these and other backgrounds we stamped, using stamps we carved ourselves or made by other processes. Stamps also included natural materials such as leaves.


"Julie, recipient of the Potomac Fiber Arts Guild’s 2011 Margaret M. Conant grant, has spent the year studying and experimenting with “kitchen” resists. She shared a number of these techniques with us . Below is my fabric made using a flour paste resist on a pale blue background that I painted in the class.


"This fabric was made by using rubber bands as resists then adding paint to the bunched up fabric. To me this piece has a very gardenlike appearance so I will probably make it into a whole-cloth quilt.


"Our entire class agreed that making gelatin plate monoprints was exciting and produced some of the most useful pieces. This is a completed small quilt using one of these prints.


"Of course, for a quilter, seeing this work in a finished piece is the major satisfaction for all the fun of painting fabric. The little quilt below was made by the “wipe-up” technique — dribbling paint on mylar then doing as the name suggests.


Betty concludes, "Excellent class!" I think that, seeing Betty's photos of both her fabrics and her finished work, you'll agree.
